
Making ceramics at home is not difficult if you know the exact procedures to follow. You will be able to craft unique pieces once you are aware of the basics. The process may seem intimidating at first. However, once you have mastered the process correctly, then you would not have to bother about anything else.
Choose your method

This is the most vital thing to do as it will help in determining the quality of clay you would be dealing with. If you are serious about what you are doing, then you can consider purchasing a small kiln for your home. Do remember that not all clays require kilns. Polymer, air dry or oven baked clay do not demand the use of a kiln. These can be air dried or baked in any standard oven. These are used for making ceramic ornaments. The air and oven dry clays are more or less similar to normal clay in resemblance. Polymer clay is available in bright colors and can be shaped into beautiful designs. It appears more like plastic when it is fired. The possibilities are endless when it comes to this clay. There is no need for a kiln while using this clay.
Pick your clay
You can choose your clay once you have decided which method you would be employing. Although most clay requires a kiln, several novelty brands can be fired on a kitchen stove. If you are looking for detailed decoration and bright colors, then opt for low fire clay. The colors are bright and glazes stay stable at this temperature. The only drawback is that the pieces are not fully vitrified which makes them less ideal for use as dinnerware.
Prepare yourself
Using clay can be a messy process. Cover the area with newspapers if you are working in the floor. It would be best to experiment in a garage.
Prep your clay
Air bubbles can prove to be disastrous if you want to craft a perfect product. Make sure to wedge or knead your clay before proceeding with the actual work. Knead the clay as you would do with dough of bread. Mold it into a small ball and slam against the plaster. Do this in a repeated manner until the bubbles have ceased. Split the ball in half if you are not sure.
Start the wheel
Throw the clay into the center with some force. Stick a handful of clay as you are just starting out. Wet your hands with water and start shaping the clay. Begin with coning the mass of clay. Brace between your palms and start squeezing upwards. Make sure your elbows remain pressed on your knees or into your inner thighs for each step of working with clay. Just follow whatever is comfortable. This will keep your hands steady during the process.
Center the clay
This is a method employed during spinning until the clay turns smooth without any wobbles or bumps. You are ready once you have obtained the cone shape. Push the tower down with one hand and make sure that it is stable. Start applying pressure on the sides once the clay has formed a wider lump at the bottom. Make sure to even the sides out.
Form the desired shape
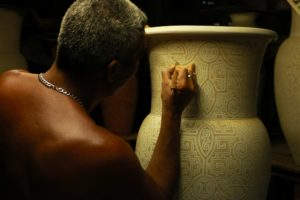
A specific set of instructions has to be followed for forming any shape. No matter what your chosen shape is, ensure that the movement is slow and deliberate. Let the wheel make at least five repetitions before a movement is finished. Ensure that the clay receives the same treatment entirely. Use a sponge to wipe away accumulated water. Clean the piece with a wooden knife and smooth the surface with a rib once you are done.
Once you are done with shaping make sure to glaze it at least once. If you do not have your own, then try to access a kiln. Different clays respond differently to heat they are subjected to. Make sure to read the directions on the packaging of the clay before glazing it. Dipping is going to be the quickest method if you have a bunch of pottery for glazing. All you need to do is dip the product that you have made in the glaze for a couple of seconds and set it. Make sure that it is evenly coated. You can as well brush the glaze if you have a ready-to-use glaze.